TOSSED RECIPES
Simple meals, bold taste. Quick recipes made for real life — always fresh, always delicious. 🌿🍴
BEST CATEGORIES
TRENDING
NEW RECIPES
Marry Me Chicken Pasta Simple and Flavorful Meal
Are you ready to impress with Marry Me Chicken Pasta? This simple and flavorful meal combines tender chicken, creamy sauce, and delicious pasta for a
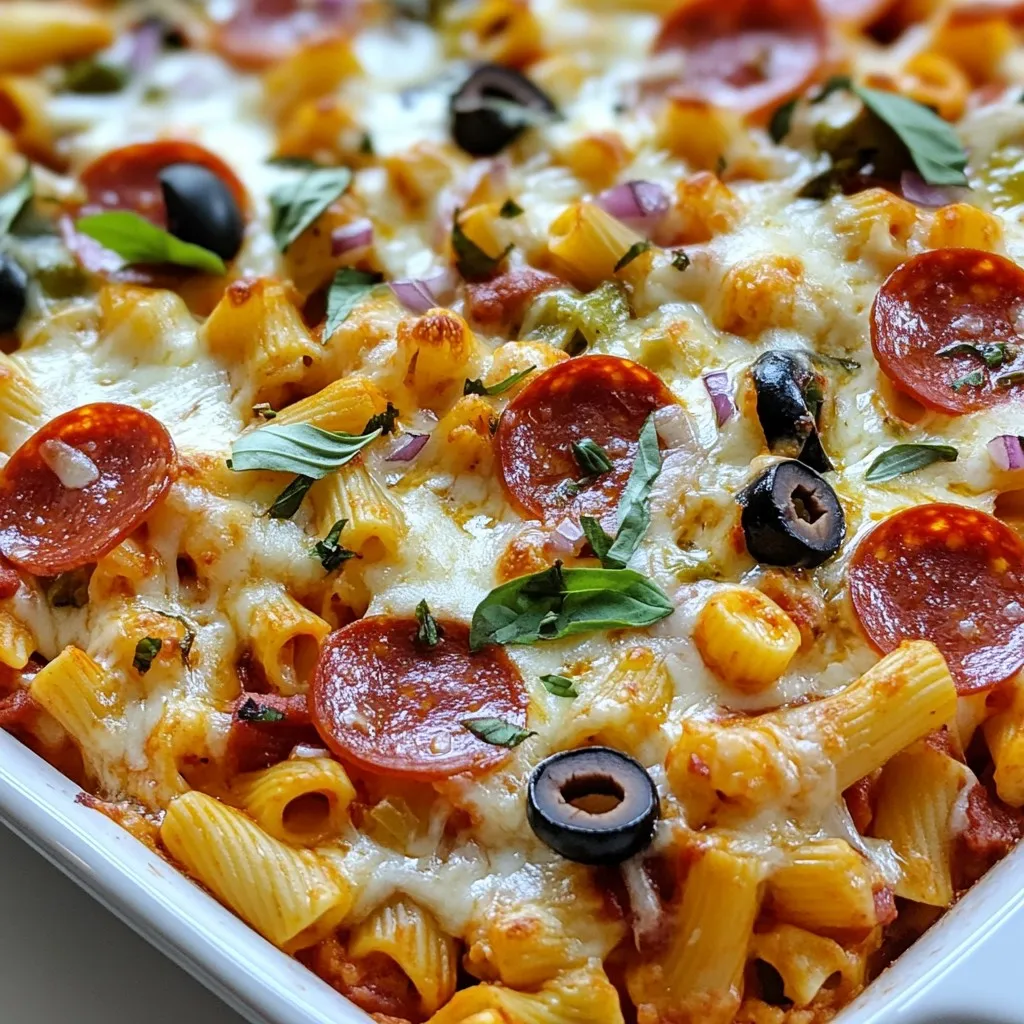
Savory Pizza Pasta Bake Easy and Flavorful Dish
Welcome to your new favorite comfort food! The savory pizza pasta bake is an easy, flavorful dish that combines the best of both worlds: pizza
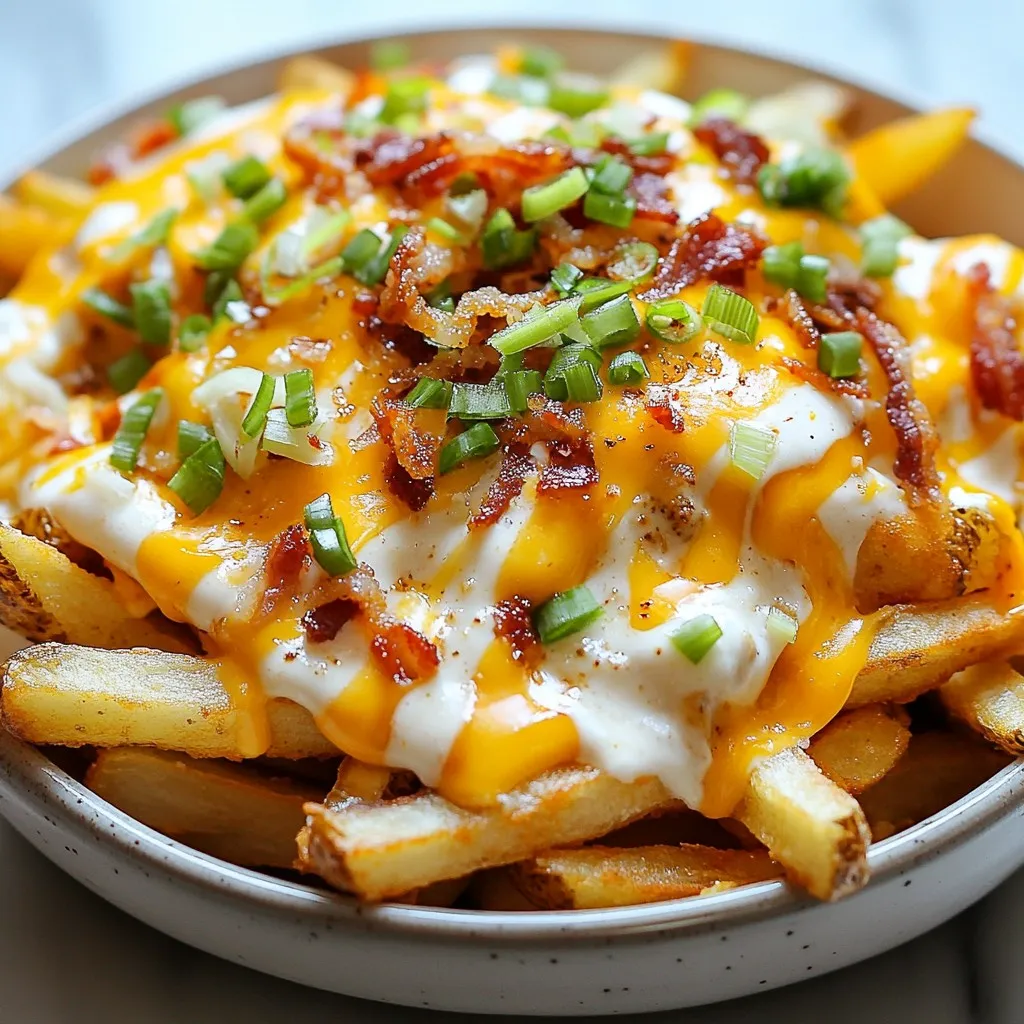
Cheddar Ranch Loaded Fries Flavorful and Easy Recipe
If you’re craving a fun and tasty snack, you’ve found it! Cheddar Ranch Loaded Fries are your answer, blending crispy fries with rich cheddar and
Cheesy Tater Tot Burritos Easy and Delicious Recipe
Craving a meal that’s both fun and filling? Look no further! Cheesy Tater Tot Burritos are your go-to choice for a quick, tasty treat. With
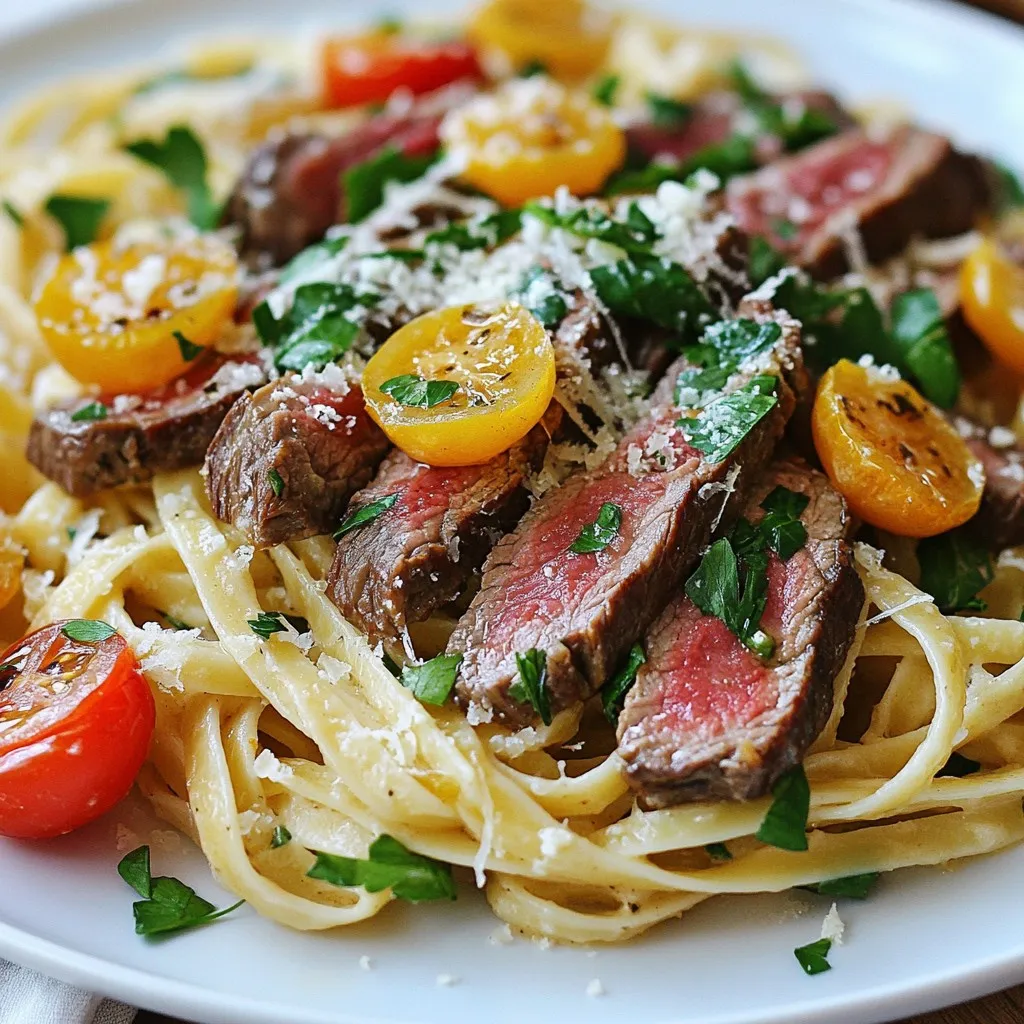
Cowboy Butter Steak Linguine Flavorful and Simple Dish
Get ready to elevate your pasta game with my Cowboy Butter Steak Linguine! This dish merges the juicy flavors of flank steak with creamy, garlic-infused
Creamy Garlic Tuscan Chicken Flavorful and Simple Dish
Are you ready to spice up your dinner routine? Creamy Garlic Tuscan Chicken is a must-try dish that’s both flavorful and simple to make! With
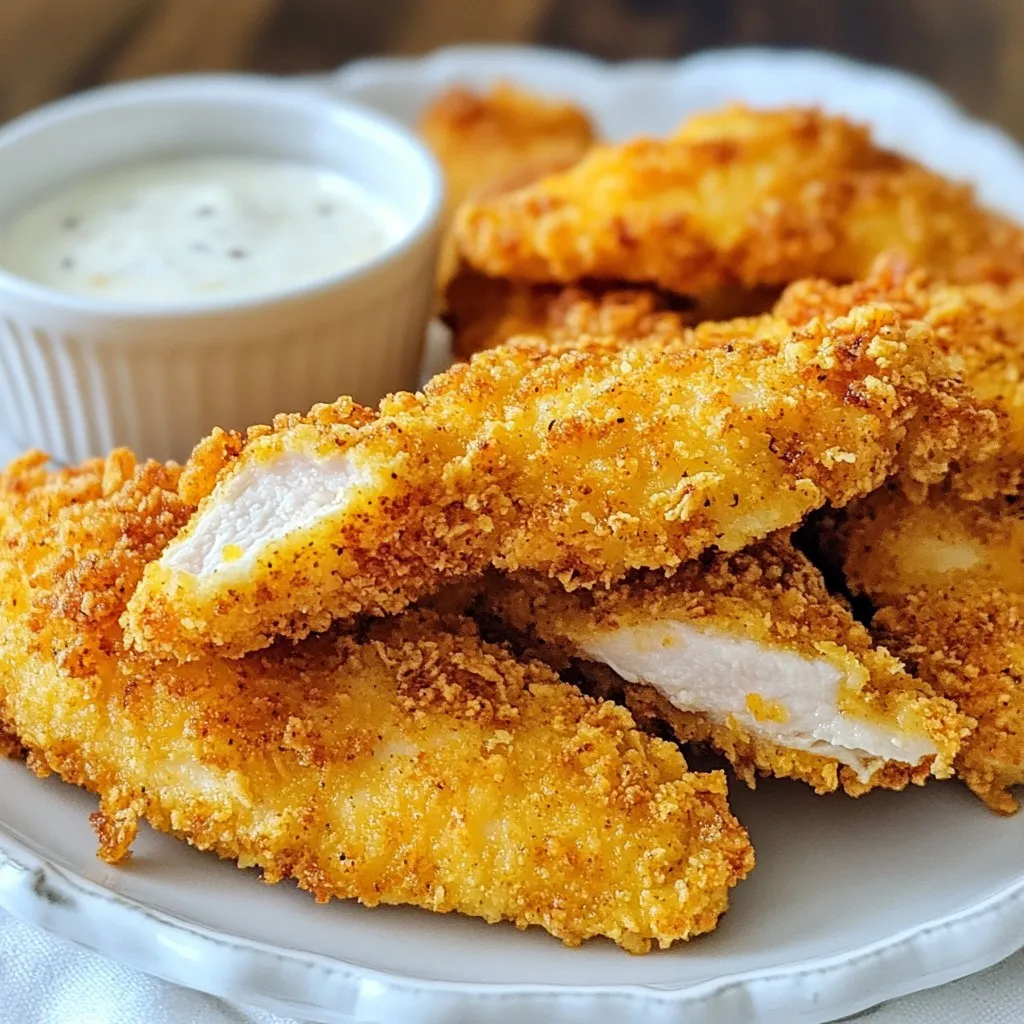
Crispy Homemade Chicken Tenders Perfectly Fried Treat
If you crave crispy homemade chicken tenders, you’re in the right place! I’ll share my secret tips for perfectly fried tenders that everyone will love.
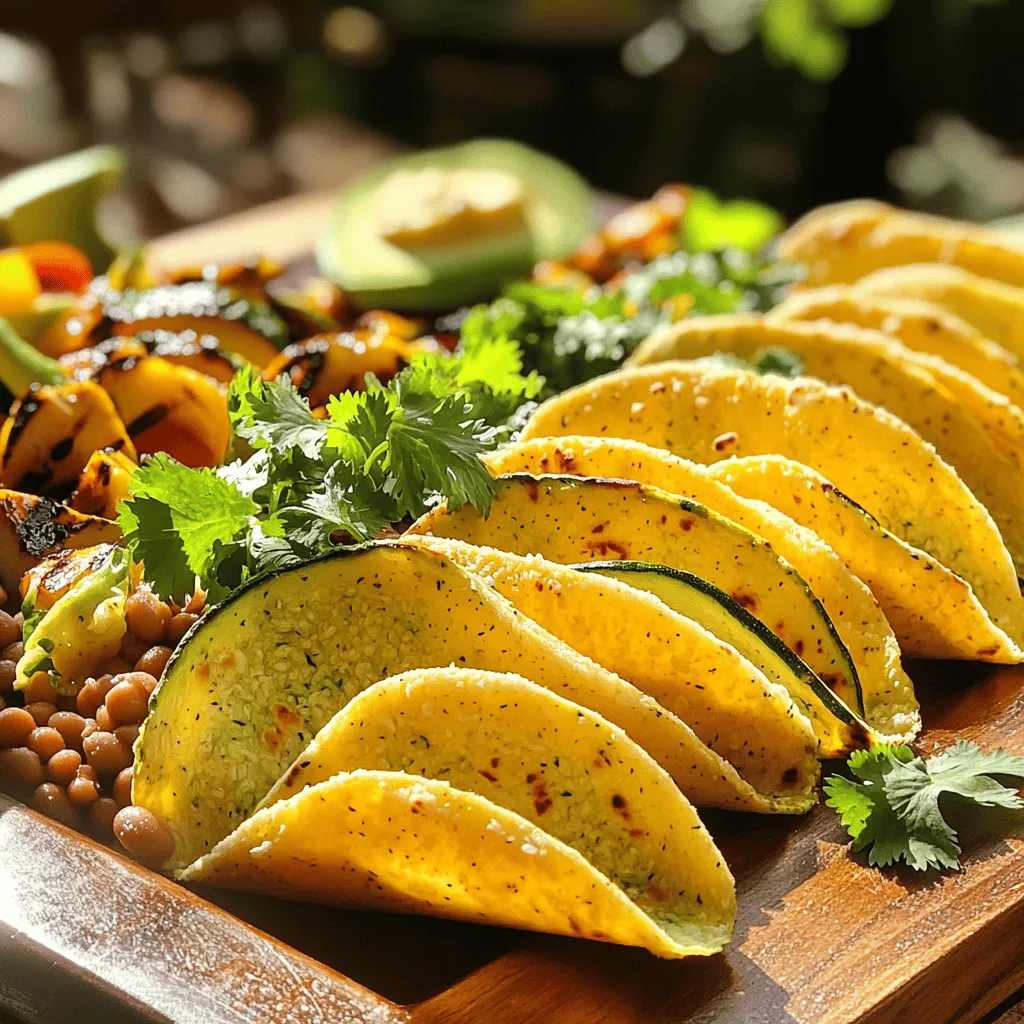
Mango Salsa Fish Tacos Flavorful and Simple Meal
Are you ready to spice up your dinner routine? Mango Salsa Fish Tacos are a vibrant and simple meal packed with fresh flavors. You’ll be

![To make these vegan zucchini brownies, you need simple and healthy ingredients. Here’s the list: - 1 cup finely grated zucchini (about 1 medium zucchini) - 1 cup all-purpose flour - 1/2 cup cocoa powder - 1/2 cup coconut sugar (or brown sugar) - 1/2 teaspoon baking soda - 1/2 teaspoon baking powder - 1/4 teaspoon salt - 1/3 cup unsweetened applesauce - 1/3 cup maple syrup - 1/4 cup almond milk (or any plant-based milk) - 1 teaspoon vanilla extract - 1/2 cup dairy-free chocolate chips (optional) These ingredients work together to create rich and yummy brownies. Each one plays a key role in flavor and texture. You might not have every ingredient on hand. Here are some easy swaps: - Zucchini: You can use finely grated carrots instead. - All-purpose flour: Try whole wheat flour for a nuttier taste. - Coconut sugar: Brown sugar works well, too. - Unsweetened applesauce: Use mashed bananas if you prefer. - Almond milk: Any plant-based milk, like soy or oat, is great. These substitutions keep the recipe vegan and still tasty. Understanding the nutritional value can help you make informed choices. Here's a quick look: - Calories: About 150 per brownie - Fat: 6 grams - Carbohydrates: 24 grams - Fiber: 2 grams - Protein: 2 grams These brownies are lower in fat compared to regular ones. They still satisfy your sweet tooth without guilt. You can find the full recipe for these delicious vegan zucchini brownies to try this healthy treat at home. To make these vegan zucchini brownies, start by gathering all your ingredients. You will need zucchini, flour, cocoa, sugar, baking powder, and more. Prepping is key. Grate your zucchini finely. This helps it mix well and keeps the brownies moist. Measure your dry and wet ingredients separately. This way, you ensure the right balance. 1. Preheat the oven to 350°F (175°C). This step is important for even baking. 2. Grease your pan or line it with parchment paper. This helps with easy removal later. 3. Mix the wet ingredients in a large bowl. Combine grated zucchini, applesauce, maple syrup, almond milk, and vanilla. Stir until it blends well. 4. In a separate bowl, whisk together the flour, cocoa powder, coconut sugar, baking soda, baking powder, and salt. This keeps your dry mix even. 5. Add the dry mix to the wet mix. Use a spatula or wooden spoon. Stir gently until just blended. Overmixing can make the brownies tough. 6. Fold in chocolate chips if you want extra sweetness. This is optional but highly recommended. 7. Pour the batter into the prepared pan. Spread it evenly with the spatula. This helps it bake uniformly. 8. Bake for 25-30 minutes. Check for doneness by inserting a toothpick. It should come out mostly clean, with a few crumbs. 9. Cool in the pan for about 10 minutes. Then transfer to a wire rack. Let them cool completely before cutting. To check if your brownies are done, use a toothpick. Insert it into the center. If it comes out with a few moist crumbs, they are ready. If it comes out wet, they need more time. Remember, baking times can vary with different ovens. Keep an eye on them. Enjoy your rich and yummy vegan zucchini brownies! For the full recipe, refer to the earlier section. To make your brownies moist and chewy, use fresh zucchini. Grate it finely and squeeze out some excess water. This keeps the brownies rich. Applesauce adds moisture too. Use unsweetened applesauce for the best results. Also, don’t overmix the batter. Mix just until combined to avoid tough brownies. One common mistake is using too much flour. Measure it correctly to avoid dry brownies. Another mistake is baking them too long. Always check doneness with a toothpick. If it comes out with a few crumbs, they are ready. Letting them cool in the pan too long can make them soggy. For the perfect texture, use a mix of coconut sugar and maple syrup. This blend provides sweetness without being too heavy. If you want a fudgier brownie, reduce the flour slightly. Adding dairy-free chocolate chips enhances both flavor and texture. Experiment with these tips to find your ideal brownie! For the complete recipe, check out the Full Recipe. {{image_2}} You can customize your vegan zucchini brownies by adding nuts or dried fruits. Chopped walnuts or pecans give a nice crunch. Almonds can also work great. If you like dried fruits, try adding raisins or chopped dates. These add sweetness and texture. Just mix in about 1/2 cup of your choice into the batter. This small change can make a big difference in flavor and fun. If you need gluten-free brownies, I recommend using almond flour or a gluten-free flour blend. These options keep the brownies moist and tasty. You might need to adjust the liquid amounts slightly. Start with the same amount of liquid, then add more if needed. This way, you keep that rich and yummy delight without gluten. Spices and extracts can change the taste of your brownies. Adding a pinch of cinnamon or nutmeg brings warmth. You might also try a splash of almond or peppermint extract. These can add a new layer of flavor that surprises your taste buds. Experiment with different combinations to find your favorite. The options are endless, and it makes baking more exciting! For the complete recipe, check out the [Full Recipe]. To keep your vegan zucchini brownies fresh, store them in an airtight container. Place them at room temperature for up to three days. If you want to store them longer, move them to the fridge. They last about a week when chilled. Always let them cool completely before storing. This helps prevent sogginess. You can freeze these brownies for later enjoyment. First, cut them into squares. Wrap each piece tightly in plastic wrap. Then, place the wrapped brownies in a freezer-safe bag. They will stay fresh for about three months. When you’re ready to eat, just thaw them in the fridge or at room temperature. To reheat, use your oven for the best flavor. Preheat it to 350°F (175°C). Place the brownies on a baking sheet. Heat them for about 5-10 minutes. This warms them up and revives their texture. You can also microwave them for about 30 seconds. Just be careful not to overheat. Enjoy them warm or at room temperature! For the complete recipe, check out the Full Recipe section. No, you cannot taste the zucchini in these brownies. The zucchini adds moisture and keeps them soft. The cocoa powder and sweeteners mask any veggie flavor. You will only enjoy rich, chocolatey goodness. This recipe makes it fun to sneak in some veggies! These brownies last about 3 to 5 days when stored in an airtight container. You can keep them at room temperature. If you want them to last longer, store them in the fridge. Just remember to let them warm up a bit before eating! Yes, you can substitute the applesauce. You can use mashed bananas or even pureed pumpkin. Both options will keep the brownies moist. The flavors will change a little, but they will still taste great. Just stick to the same amount, about 1/3 cup. For the full recipe, you can check out the complete instructions and details. Vegan zucchini brownies are delicious and easy to make. We covered all the essential ingredients you need and suggested great substitutions. I shared detailed steps for preparing and baking, plus tips to check for doneness. You can avoid common mistakes to ensure your brownies are moist and chewy. Don't forget the fun variations to try! Store them well to keep them fresh. You can even freeze extras for later. Now, you’re ready to bake. Enjoy these treats that are both tasty and guilt-free!](https://tossedrecipes.com/wp-content/uploads/2025/07/be3da008-ef75-4a73-94ee-d6f0ebc6426c.webp)


![- 4 ripe peaches, pitted and sliced - 2 cups whole milk - 1/2 cup granulated sugar - 3 large eggs - 1 teaspoon vanilla extract - 3 tablespoons cornstarch - 1/4 teaspoon ground cinnamon - A pinch of salt - Fresh mint leaves for garnish (optional) - Medium saucepan - Mixing bowl - Whisk - 8x8-inch baking dish Choosing ripe peaches Ripe peaches are key for this dessert. Look for peaches that feel soft when you gently squeeze them. They should have a sweet smell and a rich color. Avoid any with bruises or dark spots. Fresh vs. canned peaches Fresh peaches offer the best taste and texture. However, canned peaches can work in a pinch. Just drain them well before using. The flavor may differ, but they are still a good option. For the best results and to make this Easy Peach Custard Dessert shine, always try to use ripe, fresh peaches. The full recipe guides you through the steps to create this delightful treat. First, set your oven to 350°F (175°C). This is the perfect temperature for baking custard. Next, grease an 8x8-inch baking dish. You can use butter or a non-stick spray. This step keeps the custard from sticking, making it easier to serve. Heat 2 cups of whole milk in a medium saucepan. Use medium heat until the milk is steaming, but do not let it boil. Remove the saucepan from the heat. In a mixing bowl, whisk together 3 large eggs and 1/2 cup of granulated sugar. Mix until it looks frothy. Slowly add the warm milk to the egg mixture. Keep whisking. This process is called tempering, which helps prevent the eggs from scrambling. Stir in 3 tablespoons of cornstarch, 1 teaspoon of vanilla extract, 1/4 teaspoon of ground cinnamon, and a pinch of salt. Make sure everything is mixed well and smooth. Now, layer the peaches in the greased baking dish. Use 4 ripe peaches that you have pitted and sliced. Spread them evenly on the bottom. Next, pour the custard mixture over the peaches. Make sure all the peaches are covered. Bake the dish in your preheated oven for 30-35 minutes. The custard should be set and lightly golden on top. Enjoy making this simple yet special treat! Tempering eggs is key for perfect custard. This step gently warms the eggs. It helps prevent them from scrambling. To temper, slowly add warm milk to the beaten eggs while whisking. This method keeps your custard smooth. To check if your custard is set, gently shake the dish. If it jiggles slightly in the center, it's ready. You can also insert a knife. If it comes out clean, your custard is done. Warm custard offers a cozy treat. Chilled custard feels refreshing, especially on hot days. Try serving it warm with a scoop of ice cream. Or enjoy it chilled with whipped cream. Both options delight the taste buds! For garnishing, use fresh mint leaves. They add a nice color and flavor. A light dusting of cinnamon also looks great. It makes your dessert pop even more. You can add spices like nutmeg for extra warmth. A pinch blends well with the peach flavor. Consider mixing in other fruits too. Berries or apples can add new tastes. They make your peach custard even more special. Explore the [Full Recipe] for more details on making this delightful dessert! {{image_2}} You can switch up the fruit in this dessert. Fresh berries like blueberries or raspberries work great. They add a nice tart flavor that mixes well with the creamy custard. Apples also make a tasty choice. Just slice them thin and layer them in the dish. You can even combine different fruits. Mixing peaches with berries can create a colorful and fruity treat. If you need a dairy-free version, use almond or coconut milk instead of whole milk. These options taste great and still keep the custard creamy. For those watching sugar, try cutting the sugar in half. You can also use a sugar substitute like stevia or monk fruit for a lower-calorie treat. Both adjustments help you enjoy this dessert while fitting your diet. Want to save time? You can use a slow cooker. Pour your custard mixture and peaches in the cooker and set it on low for a few hours. This method makes the custard soft and creamy. If you’re in a hurry, try the microwave. Pour the mixture into a microwave-safe dish and cook it in short bursts. Check it often to avoid overcooking. You can find the full recipe to try these methods at home. To store leftovers, let the peach custard dessert cool first. Then, cover it tightly with plastic wrap or transfer it to an airtight container. This helps keep it fresh. You can store it in the fridge for up to three days. Glass containers work well for storage. They don’t absorb odors and are easy to clean. Yes, you can freeze peach custard dessert! Just make sure it is completely cool. Cut it into portions for easier defrosting. Wrap each piece in plastic wrap and then in aluminum foil. This extra layer helps prevent freezer burn. When you’re ready to eat, thaw it overnight in the fridge. To reheat, place the custard in the oven at 350°F (175°C) for about 15 minutes. For the best quality, use leftovers within three days if refrigerated. If frozen, aim to eat it within two months for the best taste. Over time, the texture may change. It might not taste as fresh after a long freeze. Enjoy your peach custard dessert while it is still creamy and delicious! To know if your custard is done, look for a few key signs. First, it should be set in the middle. You can gently shake the dish. If the center jiggles slightly but not too much, it's ready. The top should have a light golden color. This shows that it has baked well. If you insert a knife, it should come out clean. If it’s wet, bake it a bit longer. Yes, you can use frozen peaches. However, they may change the texture a bit. Frozen peaches often become softer when cooked. This can make your custard less firm. The flavor might also be less fresh than ripe peaches. If you use frozen ones, let them thaw and drain excess water. This step helps keep your custard from being too watery. Making this dessert ahead is simple. You can prepare the custard and peaches a day in advance. Just follow the recipe until baking. Cover the dish and store it in the fridge. When you are ready, bake it as directed. The custard can sit in the fridge for up to two days. Just remember to let it cool before serving. No, it is not necessary to use whole milk. You can use other types of milk. Almond milk or oat milk works well too. Just know that the texture might change. Whole milk gives a creamier feel. If you choose a lower fat milk, the custard may be less rich but still tasty. You now know how to make a delicious peach custard dessert. We talked about the ingredients, key steps, and helpful tips. Choosing the right peaches is crucial for taste. Remember, you can customize this dessert with other fruits or methods. Store leftovers in the fridge or freeze them for later. Enjoy making and sharing this treat with friends and family. Your kitchen is now ready for a fun and tasty adventure!](https://tossedrecipes.com/wp-content/uploads/2025/06/0e68ad5c-10af-4363-8698-f6b27dfee2eb.webp)